
How to get that perfect pony picture for Christmas cards
There’s something magical about a Christmas photo with your pony – whether it’s for cards, social media, or just to treasure. But getting that perfect shot isn’t always easy! Ponies don’t understand ‘hold still’ or ‘look at the camera,’ and adding festive props or decorations can make things even trickier. The good news? With the right planning, timing, and techniques, you can capture beautiful holiday memories that you’ll treasure forever – all while keeping your pony happy and safe.
This guide will walk you through everything you need to know to get magazine-worthy Christmas photos with your pony. Remember, the best photos are the ones where everyone – including your four-legged model – is relaxed, comfortable, and having fun!

Safety first: the golden rules
Before we talk about camera angles and lighting, let’s establish the non-negotiable safety rules for pony photography:
Your pony’s wellbeing is more important than any photo: If your pony is stressed, uncomfortable, or showing signs of anxiety, stop the photo session immediately.
Always have adult supervision: Even if you’re an experienced rider, have an adult present during photo sessions. They can help manage your pony, spot safety issues, and assist with props or equipment.
Make sure your pony is safe: Your pony should be held by someone responsible at all times, either on a lead rope or properly tied (if he’s good at being tied).
Use safe props only: Any props, decorations, or costumes must be pony-safe. Nothing sharp, nothing that could get tangled, nothing toxic, and nothing that will spook your pony. When in doubt, leave it out.
Know when to stop: Set a reasonable time limit for your photo session – 15-20 minutes is usually plenty. If your pony is losing patience before then, wrap it up early. You can always try again another day.
Timing is everything
The secret to great pony photos? Choosing the right time! Here’s how to pick the perfect moment:
Early morning or late afternoon: In South Africa’s hot summer, avoid midday heat. Early morning or late afternoon not only gives you better lighting (photographers call this ‘golden hour’), but your pony will be much more comfortable. NOTE: Make sure to spray plenty of insect repellent at these times, however, due to the risk of African Horse Sickness.
When he’s calm: You know your pony’s personality and routine. Choose a time when he’s typically relaxed – maybe after turnout, or during his usual grooming time. Don’t try to take photos when he’s usually excited (like just before feeding time!).
Good weather days: Pick a day with decent weather – not too windy (which can make ponies spooky), not raining, and not extremely hot. Overcast days actually give lovely soft light for photos, so don’t wait for blazing sunshine!
Preparation
The key to a successful photo session is preparation. Here’s your pre-photo checklist:
The day before:
- Give your pony a thorough groom and, if needed, a bath. Clean hooves, brushed coat, and a detangled mane and tail make a huge difference.
- Plan your props and decorations. Gather everything you’ll need and check it’s all safe.
- Choose your location. Scout out good spots with nice backgrounds and good lighting.
- Charge your camera or phone and clear space for lots of photos!
On photo day:
- Give your pony a quick groom to remove any stable stains or mud.
- Clean his face carefully, especially around the eyes and nostrils.
- Pick out hooves and give them a wipe – shiny clean hooves photograph beautifully.
- Apply coat polish or shine spray if you have it (make sure your pony doesn’t mind the spray!)
- Put on clean, nice-looking tack if you’re including it in photos.
- Bring treats (for rewards) and a helper (essential!)

Location, location, location
Where you take photos makes a huge difference to how they turn out. Here’s how to choose great locations:
Simple backgrounds: The best backgrounds are simple and uncluttered. A plain stable door, a fence line, a field, or a wall all work beautifully. Avoid busy backgrounds with lots of random objects, parked cars, or clutter as they distract from your pony.
Natural elements: Trees, fields, or natural fences make lovely, festive-looking backgrounds. If you can find some greenery or a pretty landscape, that’s even better.
The stable door: A classic! Your pony looking over his stable door is always a winner. It’s safe, familiar to him, and easy to decorate. Add a wreath above and you’ve got instant Christmas magic.
Consider the light: Think about where the sun will be. You want light on your pony’s face, not behind him (which creates a dark silhouette). Dappled shade under trees can give beautiful, soft lighting. Avoid harsh midday sun, which creates dark shadows and makes everyone squint!
Props and decorations that work
Props can make your Christmas photos extra special, but they must be safe and pony-appropriate. Here are tried-and-tested prop ideas:
GREAT props (safe and effective):
- Fresh greenery: A simple wreath on the stable door, or some pine branches arranged nearby (out of reach!) look festive without being over the top.
- Red ribbons: Tie big fabric bows to stable doors, fence posts, or gates. Keep them secured and away from where your pony could get tangled.
- Festive buckets: A decorated bucket filled with (safe) apples or carrots makes a great prop.
- Christmas blankets: If your pony has a festive rug or blanket in red, green, or plaid, that’s perfect. Make sure it fits properly, and your pony is comfortable wearing it.
- Santa hats (held, not worn): Instead of trying to strap a hat on your pony (stressful!), hold it near his ears for just a second while someone snaps the photo. Much easier and safer, and you can edit out the person later on.
- You in festive gear: Sometimes the best prop is you! Wear a Santa hat, festive jumper, or elf costume. Your pony won’t mind what you’re wearing, and it makes the photo clearly Christmassy
AVOID these props:
- Anything with elastic or straps: Elastic around ears, chin straps, or anything that goes on your pony’s head can be dangerous if he panics.
- Tinsel or sparkly things: These move and catch light in ways that can spook horses, plus they’re dangerous if eaten.
- Balloons: Even a calm pony can spook at a balloon. They pop, they float weirdly, they’re just not worth the risk.
- Fake snow or spray-on decorations: These chemicals can irritate your pony’s skin, eyes, and respiratory system.
- Anything loud or mechanical: Singing decorations, moving toys, or anything with batteries that makes noise will spook most horses.
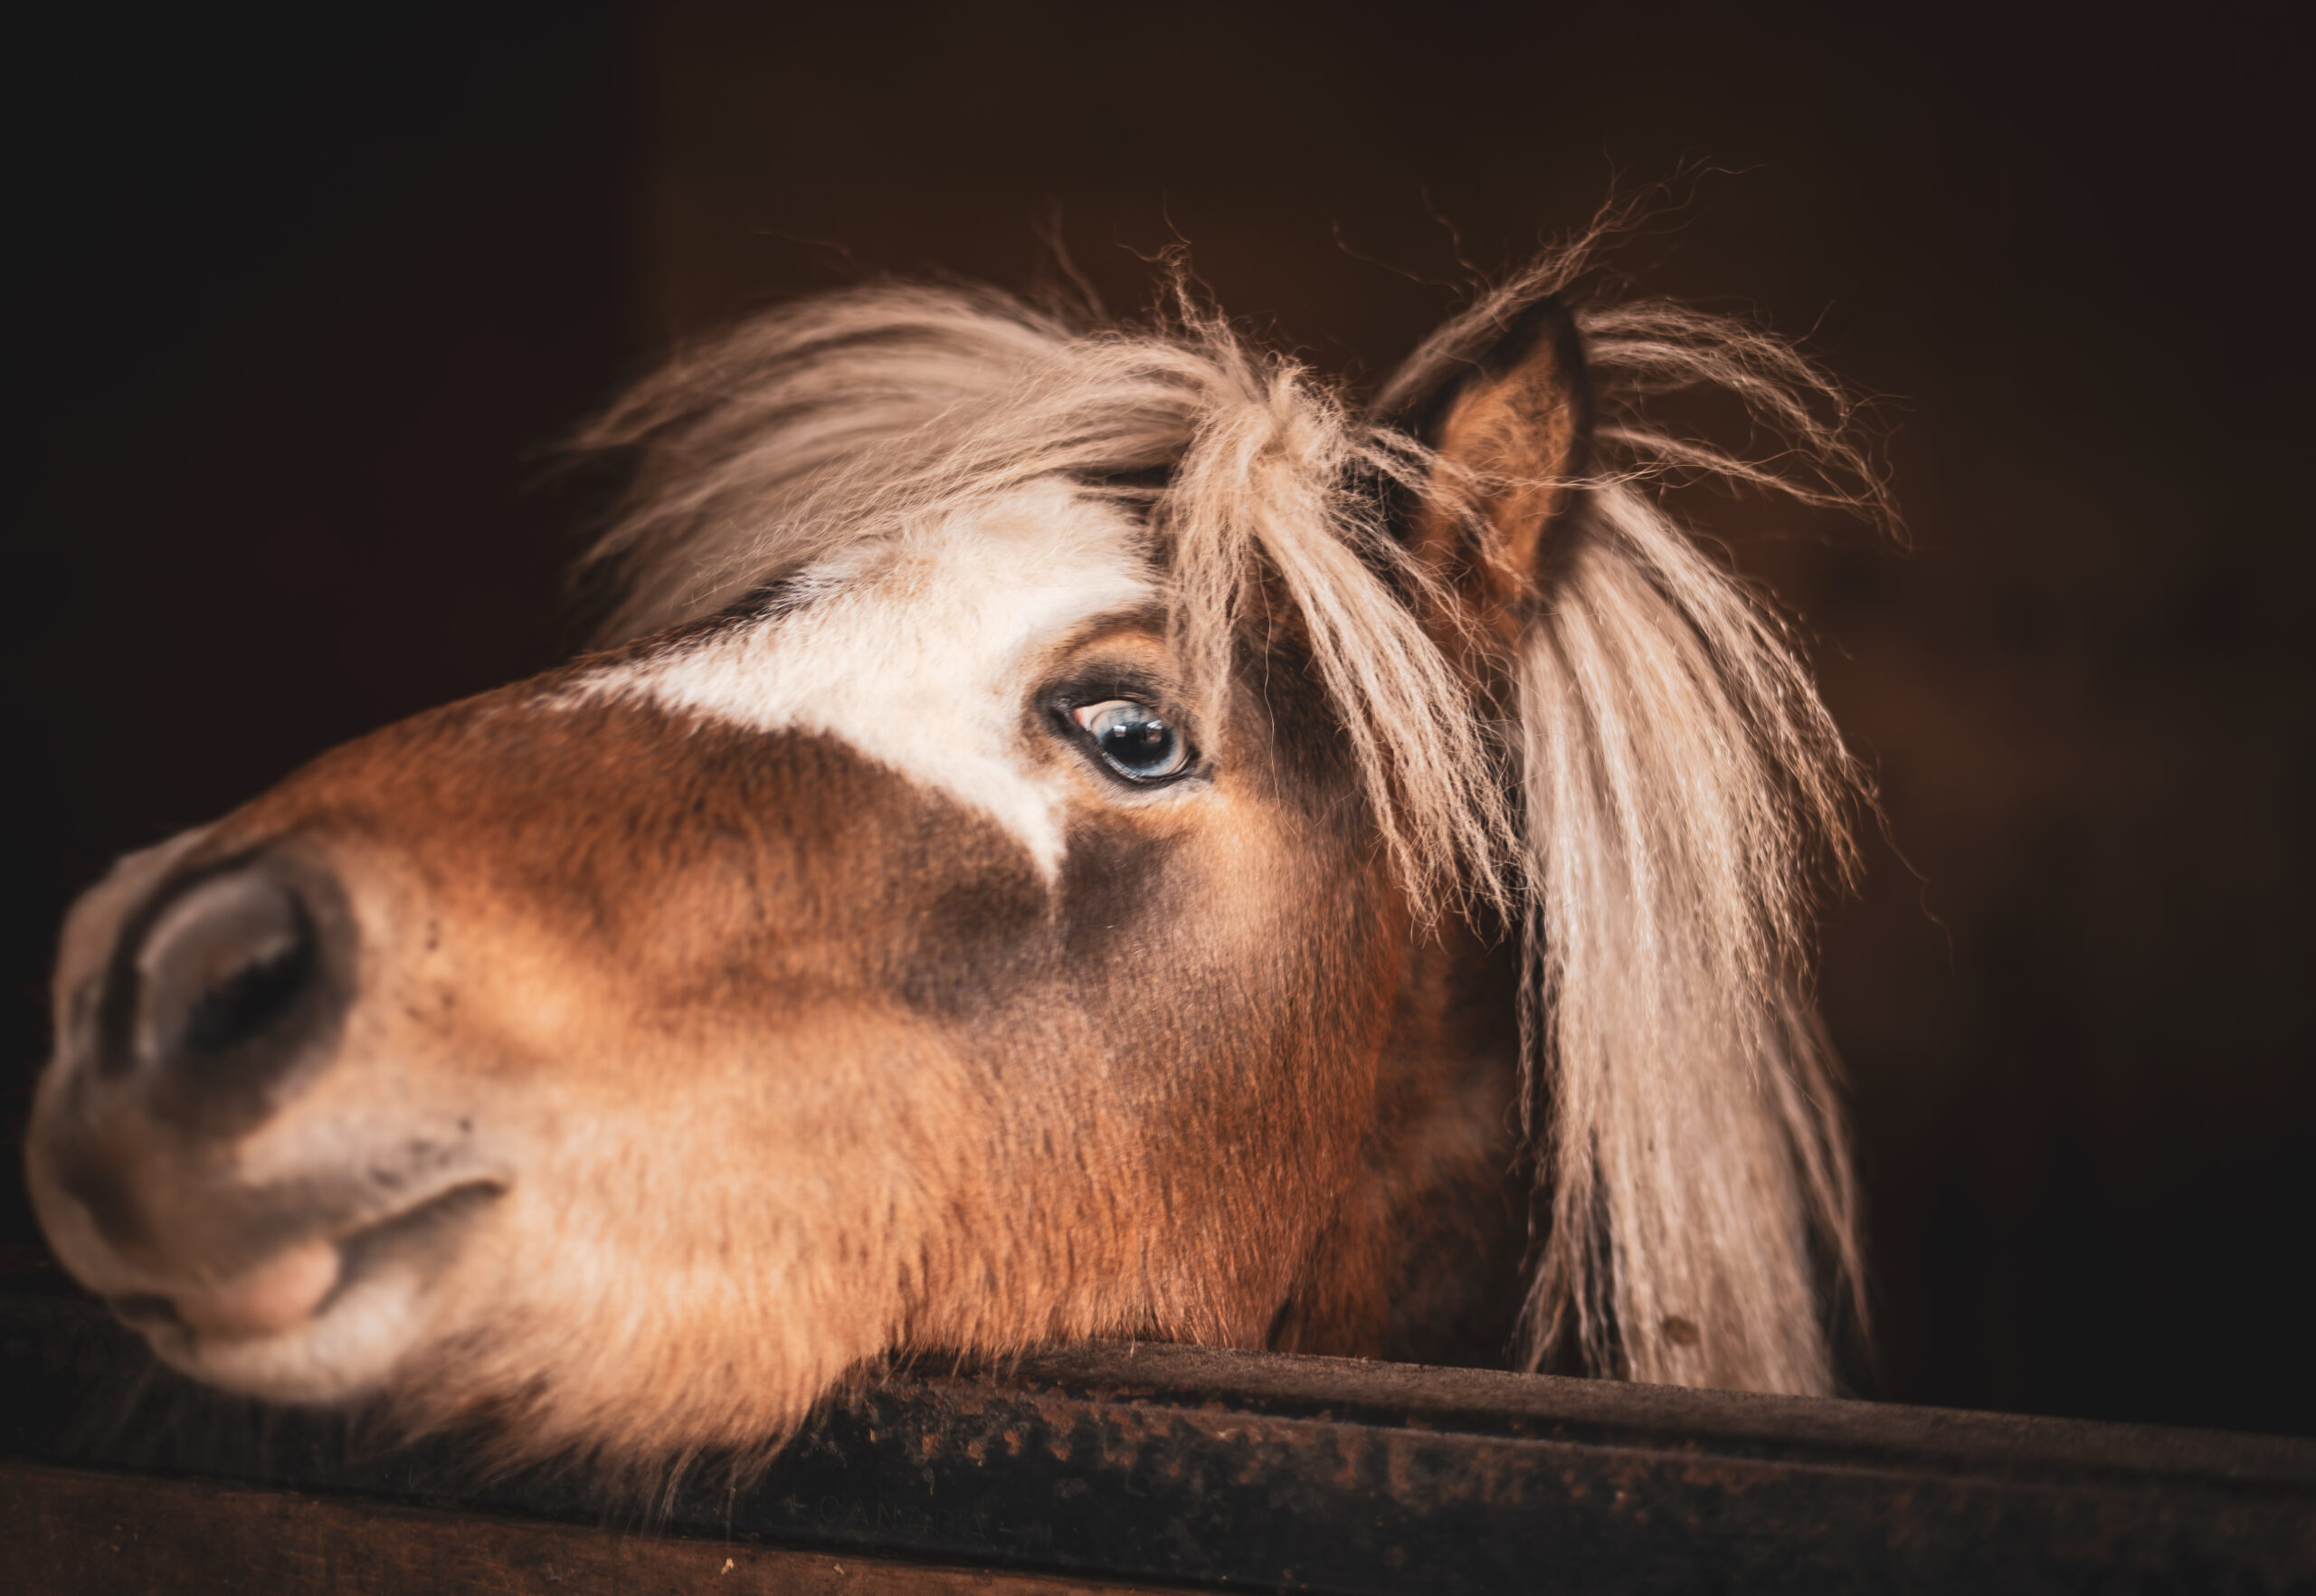
Getting those ears forward
The holy grail of pony photos: both ears forward, alert expression, looking at the camera. Here’s how to achieve it:
The treat bag rustle: The sound of a treat bag crinkling often gets immediate attention. Have your photographer hold the camera ready, then rustle the bag. Snap quickly – you’ve only got a few seconds before your pony expects the treat!
The squeaky toy: A small dog toy or squeaker can grab your pony’s attention. One quick squeak often gets those ears pricked forward. Don’t overuse it, though – it loses its magic if you squeak repeatedly.
The interesting object: Hold something your pony doesn’t see every day up near the camera – a stuffed toy, a feather duster, a small mirror, or a colourful hat. His curiosity will get those ears forward as he investigates.
The unusual sound: Clicking your tongue, whistling, or making a playing a horse sound on your phone can attract attention.
Another horse: If there’s another pony nearby (safely separated!), your pony will often prick his ears and look alert, watching his friend. This gives you that attentive expression naturally.
Reward immediately: As soon as you get a good shot, give your pony a treat and lots of praise.

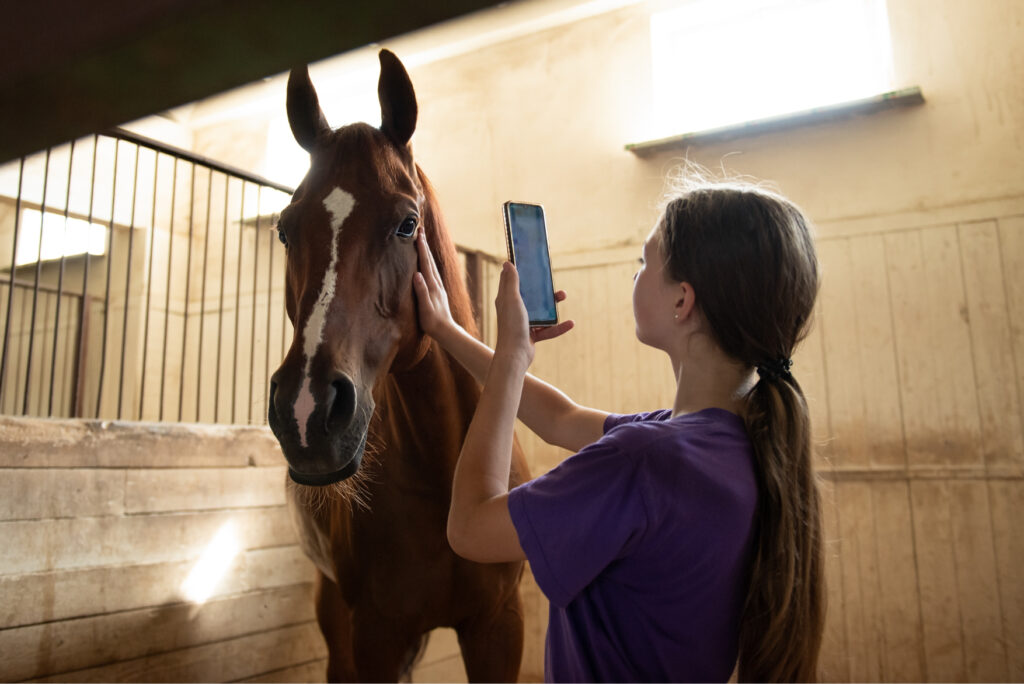
Camera techniques
You don’t need fancy camera equipment – a smartphone works brilliantly! Here are tips to make any camera produce great results:
Get down to your pony’s level: Photos taken from human height, looking down at your pony, aren’t as flattering as photos taken from his eye level. Crouch down, kneel, or even sit to get a better angle.
Focus on the eyes: The eyes are the most important part of any animal photo. Make sure your camera focuses on your pony’s eyes – they should be sharp and clear. If the eyes are in focus, small blurriness elsewhere doesn’t matter much.
Take LOTS of photos: Don’t rely on getting the perfect shot on your first try. Take dozens of photos! You can delete the bad ones later.
Use burst mode: Most phones and cameras have a burst mode that takes multiple photos rapidly when you hold down the button. This is perfect for catching that split second when everything aligns – ears forward, good expression, nice pose.
Rule of thirds: Imagine your photo divided into a grid with three sections across and three sections down. Try positioning your pony’s head where the lines intersect, rather than dead centre. This creates more visually interesting photos.
Fill the frame: Get close enough that your pony fills most of the photo. Having your pony tiny in the middle of a huge landscape doesn’t have as much impact. You want him to be the star!
Watch the background: Before you snap, quickly scan the background. Is there a post that looks like it’s growing out of your pony’s head? A wheelbarrow in the corner? Move slightly to one side to improve the background.
Natural light is best: Avoid using flash – it can spook your pony and creates harsh, unflattering light. Natural daylight gives much better results. If it’s cloudy, that’s actually perfect – clouds act like a giant softbox, giving lovely even lighting!
Classic photo poses
Not sure how to pose with your pony? Here are some tried-and-tested options:
The stable door look: Your pony looking over his stable door is a classic for good reason. It’s safe, easy, and always looks good. Stand beside the door or crouch in front for different perspectives. Add a wreath above for instant Christmas vibes.
Side profile: Stand beside your pony facing the same direction, with your hand on his neck or shoulder. Make sure both of you are looking toward the camera, or both are looking the same direction away from it.
The hug: Gently wrap your arms around your pony’s neck (don’t squeeze tight – keep it loose and comfortable for him). Rest your cheek against his neck and smile.
Forehead to forehead: Stand facing your pony and gently touch your forehead to his (between his eyes, not directly on the nose, where it might tickle).
Looking up: Stand beside your pony looking up at him. This angle makes your pony look noble and majestic. Have the photographer shoot from slightly below you for the best effect.
The kiss: Give your pony a gentle kiss on his muzzle or cheek. Make sure he’s okay with face-touching first – not all ponies love this!
Just the pony: Sometimes the best photos don’t include people at all! A beautiful portrait of just your pony, with his ears forward and looking majestic, can be absolutely stunning. Let him be the star.
Action shots: If your pony is feeling energetic and you’re in a safe enclosed area, have someone lead him past the camera at a trot. Action shots can be spectacular, though they’re trickier to get right. Use burst mode and take lots!

Group photos
Want a photo with family, friends, or multiple ponies? Here’s how to manage group photos successfully:
One pony at a time: If you’re taking photos with multiple ponies, add them one at a time rather than bringing them all at once. Get the first pony settled, positioned, and happy before adding another.
Everyone needs a job: Each pony should have a designated handler who’s responsible for keeping that pony safe, calm, and in position.
Keep sessions short: Group photos are harder because you’re coordinating multiple subjects. Keep sessions brief – maybe 10 minutes maximum. If it’s not working, abandon the attempt and try again another day.
Odd numbers look better: Groups of three or five people/ponies usually look better than groups of two or four. If you have an even number, stagger people at different heights or depths to create visual interest.
Plan the formation: Decide beforehand where everyone will stand. The tallest pony in the middle with shorter ponies/people on the sides often works well. Practice without ponies first, so everyone knows their spot, then add ponies and work quickly!
Editing
Even great photos can benefit from a little editing. Here’s what to focus on:
Brightness and contrast: Most phone cameras and simple editing apps let you adjust brightness (making the photo lighter or darker) and contrast (making the difference between light and dark areas more dramatic). Small adjustments here can transform a dull photo into a vibrant one.
Cropping: Don’t be afraid to crop! Cut out distracting elements at the edges, reframe to put your pony in a better position, or zoom in closer on his face. Cropping is one of the most powerful editing tools.
Straightening: If the horizon line is wonky or your pony looks tilted, use the straighten tool.
Colour adjustments: You can enhance the festive feeling by making reds redder and greens greener, or by warming up the whole photo to give it a golden, cosy glow. Don’t go overboard – subtle adjustments look best.
Avoid heavy filters: While Instagram filters can be fun, they often look dated quickly. Stick to natural-looking edits that enhance rather than transform your photo.
Remove distractions: Some editing apps let you remove small distractions like specs of dirt or background objects. This is handy for cleaning up almost-perfect photos.

Sharing your photos
You’ve got your perfect photos – now what? Here are fun ways to use them:
Christmas cards: The classic! Many online services let you upload photos and create custom Christmas cards. Send them to family, friends, and your riding instructor.
Social media: Share your festive photos on Instagram, Facebook, or whatever platform you use. Use Christmas hashtags like #HorseChristmas or #PonyChristmas to connect with other horse-lovers celebrating the season.
Prints and frames: Print your favourite photo and frame it as a gift for parents or grandparents. You could also create a photo calendar for the new year featuring different photos of you and your pony for each month.
Scrapbooks and albums: Add your Christmas photos to your riding journal or scrapbook.
Thank you cards: Use your photos to create thank you cards for your riding instructor, or anyone who’s helped you and your pony during the year.
Final tips
As you head out for your Christmas photo session, remember these final tips:
Patience is key: The perfect photo rarely happens on the first try. Be patient with your pony, with your photographer, and with yourself. Sometimes it takes three or four sessions over different days to get that magazine-worthy shot – and that’s completely normal (even for us!)
Happy pony = best photos: You can see in photos when a pony is relaxed and content versus when he’s stressed or uncomfortable. If your pony isn’t enjoying the session, it will show in the photos – so prioritise his comfort and the photos will naturally be better.
Imperfection is perfect: Sometimes the best photos are the unplanned ones – your pony pulling a silly face, trying to eat the decorations, or nuzzling you for treats. These candid moments often capture personality better than perfectly posed shots. Don’t delete the ‘imperfect’ photos – they might be your favourites!
Safety first: We’ve said it before, and we’ll say it again: no photo is worth risking your safety or your pony’s welfare. If something doesn’t feel safe, if your pony is getting stressed, or if conditions aren’t right, postpone the session.
Picture perfect
Christmas with your pony is special, and capturing those moments in photos lets you treasure them forever. Whether you end up with a perfect magazine-worthy shot or a collection of outtakes that make you laugh, you’re creating memories of this time in your life, this Christmas, and this unique partnership with your pony.
So grab your camera, gather your props (the safe ones!), find your best light, and get creative. Be patient, stay safe, and most importantly, have fun.

